
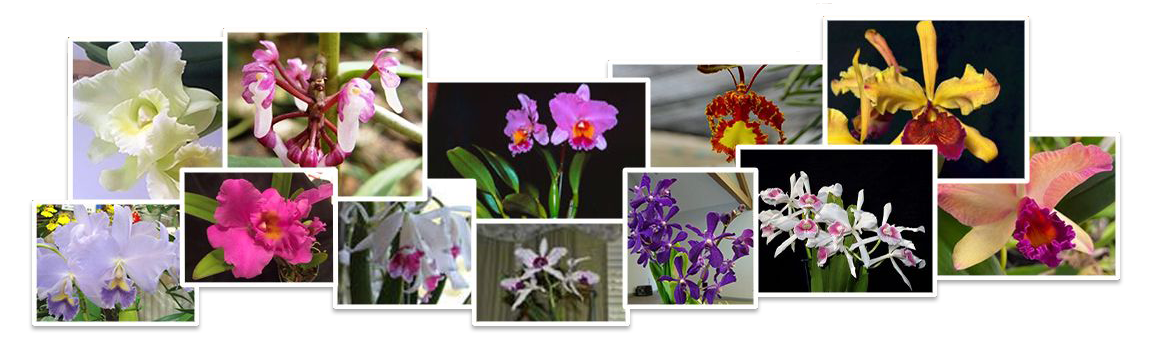
Orchid Care: Grow Strong, Healthy Orchids
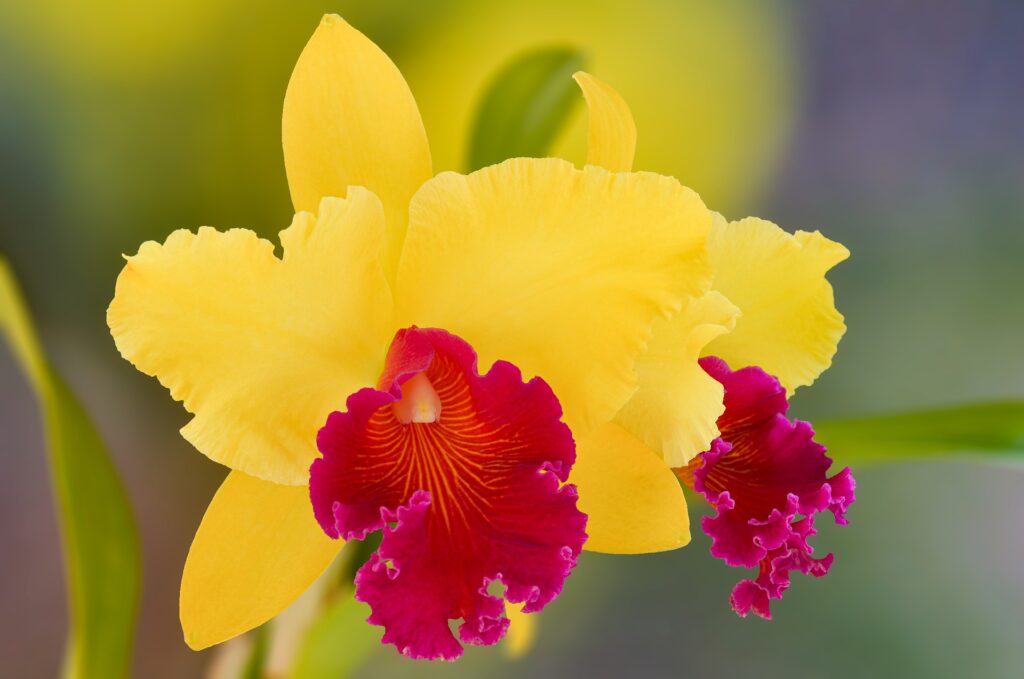
Caring for Your Cattleya
(“Cat-Lee-Ya”)
You may already be familiar with fragrant “corsage” orchids, commonly known as cattleya (“Cats” for short). Cats come in many different shapes and sizes; many of them are also fragrant. They’re easy to grow, and we would certainly recommend them to both novice and seasoned growers. Many Cats adapt beautifully to subtropical conditions. You can grow them in pots, other containers, or in trees. Their intricate, often-fragrant flowers are popular with growers everywhere. One fragrant and beautiful Cat can make an entire room special.
Each new growth (called a “spike”) starts with a bud near the base of the previous growth. Cats tend to grow horizontally along or just below the surface, and most will grow out of their pots within a couple of years. Because they’re air plants, cats have pseudobulbs, which are used for water storage. They also have large roots covered with a water-retentive velamen. These roots need to dry out between watering and should be placed in free-draining media and pots. They’re also adapted to seasonal changes in temperatures and water. We keep mature Cats outdoors even when the temperature gets as low as 40 degrees Fahrenheit (4.4 degrees Celsius).
The potting medium should be allowed to dry between watering. For a more open, porous mix, you may need to water more often. Cats mounted on cork or driftwood can be watered every day while they’re growing, if they have good air circulation, and the mount dries during the day. If you can, always water early in the morning. During the cooler, shorter days of winter, water less often, particularly if your plants are resting and not actively growing.
Cats grow best in very bright shade with some sunlight very early or very late in the day but should be protected from direct midday sunlight. It’s easy to tell if a cat receives the right amount of light by looking at the foliage. If the plant’s leaves are a rich shade of dark green, it isn’t getting enough light. A plant with light-yellow-green leaves is getting too much light. The correct light levels produce foliage with an attractive medium-green color. If your Cats aren’t flowering, it’s probably because of a lack of light. Don’t move plants abruptly from too shady to very bright conditions. Move the plant gradually to a brighter area to prevent burning it.
Generally, Cats should be repotted about every 2 years or so. However, the need for repotting depends on two things. First, check the potting medium to see if it’s breaking down; this often happens at the 2-year mark. Second, see if the plant is growing out of its pot. If so, use a pot that’s the next bigger size compared to the current one.
Remember: orchids should be “fed weakly, weekly.” And feed them once a month with a bloom booster.
Caring for Your Dendrobium
Dendrobium (“Dens” for short) are quite easy to grow. Many of them bloom twice a year, and their flowers can last for 1 – 2 months. Some varieties of mature plants are as short as 3 inches, while others are over 3 feet tall. Large mature plants can continue to produce blooms that stay open nearly all year round. There are over 1,000 species in the Dendrobium family and even more hybrids!
Dens need bright light. You can bring them inside while in bloom but they still need lots of light. Then they should be put on the lanai (They grow great on lanais) so that they can grow a new stalk (pseudobulb) and bloom again. Direct Summertime sun is too hot for Dens, and they could burn. Winter sun is safe (In warmer areas) when filtered through the screen (Like a lanai) – Not Direct sunlight.
Dens cannot tolerate temperatures below 50 degrees. Bring them inside. Cool weather causes them to lose their leaves (But they can still bloom on the pseudobulb). As a rule, Dens grow robustly during spring and summer, growth stops altogether in late fall, and the plants may drop their leaves during the winter resting period.
Dens need warm conditions and should not be exposed to cold temperatures. They’re great plants though and with good care, these orchids are capable of blooming multiple times from the same canes and twice a year!

And remember “Orchids should be fed weakly, weekly”. Feed them once a month with a “Bloom Booster” and repot them annually after they stop blooming in fresh potting mix but try to keep the orchid root bulb together.
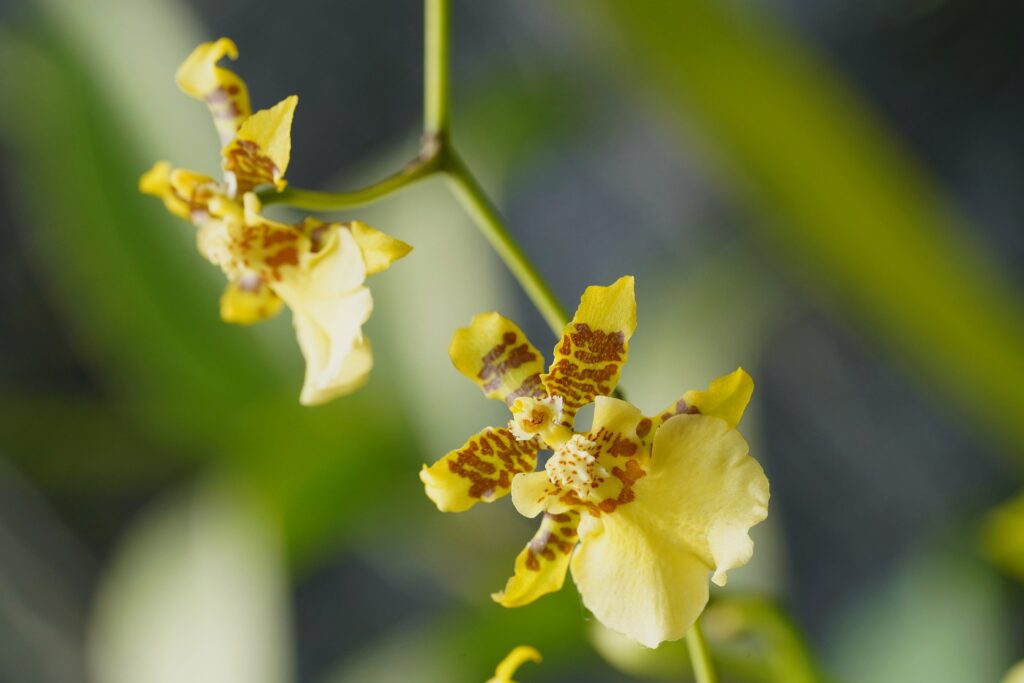
Caring for Your Oncidium
(“On-Sid-E-Um”)
The Oncidium orchid is available in over 300 beautiful species. They are great orchids! Oncidiums come in many different colors and variations, but most have a golden, yellow, or orange hue. Oncidiums like temperatures between 55 and 85 degrees. Oncidiums need mild, filtered light.
If the leaves are dark green, the orchid is not getting enough light. If they are reddish green, they are getting too much light. If you have the right amount of light, Oncidium leaves should be medium to light green.
Oncidium potting medium should become slightly dry between watering, then water thoroughly until water runs through the pot. And remember “Orchids should be fed weakly, weekly”. Feed them once a month with a “Bloom Booster” and repot them every 1 – 2 years after they stop blooming in fresh potting mix.
Caring for Your Phalaenopsis
(“Fal-En-Op-Sis”)
Often called “Moth Orchids”, Phalaenopsis (Phals) are popular among both new and experienced orchid lovers. They are easy to grow and bloom for long periods of time, sometimes up to 3 months. They also grow well inside the house.
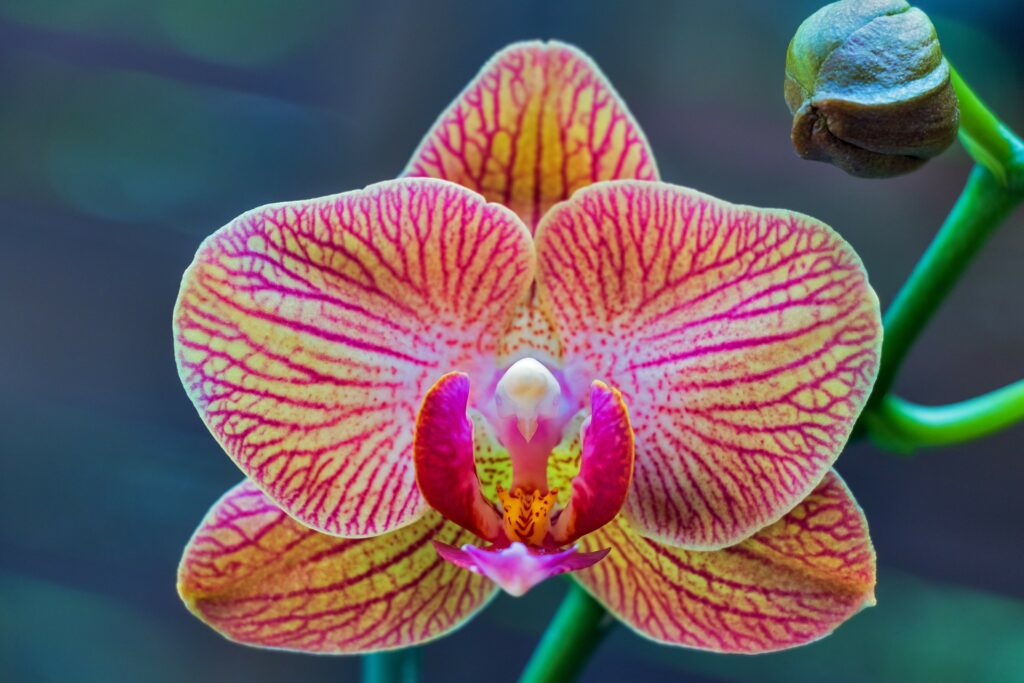
Phals like bright areas but do not like direct sunlight at all and do not like to dry out between watering. During the winter, you generally find phals with white and pink flowers. Due to advances in hybridizing, during the warmer months, yellow and red shades, with smaller and less numerous flowers per stem prevailing. Phals have no capacity to store water for dry periods.
Unlike cattleyas, which are adapted to specific moist and dry seasons, Phals always need moderate but even moisture and moderate to high humidity. Perfect for the southern U.S.! Phals need to be cooled down before they bloom. This is what initiates the blooming spike. Just try to keep them away from temperatures below 48-50 degrees.
Potting medium for Phals should include a generous amount of moisture-holding material like sphagnum moss. Just remember “Orchids should be fed weakly, weekly”. Feed them once a month with a “Bloom Booster” and repot them every 1 – 2 years after they stop blooming in fresh potting mix.
Caring for Your Bulbophyllum
(“Bulb-O-Fill-Um”)
Bulbophyllum (Bulbo) orchids need moderate to bright lighting, with the morning being the best time for receiving sunshine. Shield your plant from direct sunlight, especially around midday when the sun is too intense. You can try early morning (before 10:00 am., after 4:00 pm) but continuous bright light through the day is better. Some Bulbos can tolerate lower light conditions. However, it will cause less flowering.
Most species of Bulbos like intermediate to warm temperatures. However, due to their ability to grow in diverse habitats, you should check specific instructions for the species you are trying to grow. You can use the www.orchidspecies.com to check the climate characteristics for your plant. Avoid placing your orchid near any cold draft of air. This will damage your plant.
Bulbos have fine root systems that generally require moisture at all times so these orchids need frequent watering, although you should check www.orchidspecies.com for your particular species and adjust watering if your Bulbo comes from a region that has dry periods. You should normally water a potted Bulbo several times a week, and mounted ones daily.
If your Bulbo is planted in bark, it will need more frequent watering but if you have planted your orchid in sphagnum moss mix, check that the moss has just dried, before watering it again. As in some other orchid species, a few Bulbos need a period of drought to initiate flowering.
The best potting mixes for Bulbos include bark, perlite, coir (coconut fiber), and sphagnum moss. You can also use combinations of these, sometimes with an additional bottom layer of charcoal. When choosing the potting mix for your Bulbo, be mindful that the roots prefer to be moist.
Bulbos need frequent watering, although you should adjust watering if the species you are growing comes from regions that have dry periods. You should normally water a potted Bulbo several times a week. Again, check www.orchidspecies.com. Generally maintain frequent watering of the plant and use a high water retention medium.
Bulbos have an extensively developed system of exceptionally fine roots so if you repot the orchid without proper care, you can easily damage their delicate root system. Therefore, repotting is not really recommended. However if you need to, repot your Bulbo every two to three years between the months of August and January. And remember “Orchids should be fed weakly, weekly”. Feed them once a month with a “Bloom Booster” and repot them every 1 – 2 years after they stop blooming in fresh potting mix.
Caring for Your Lady Slipper
Lady Slippers like low light: like Phalaenopsis and African violets, lady slippers are often ground dwelling and are in much more shade than other orchids. Because lady slippers are often in more shade, they require cooler temperatures and will survive but not thrive in high temperatures.

Watering and fertilizing is the same as Phalaenopsis, adjust depending on the potting media. Repot usually in 1″ larger pots even if the leaves extend past the rim of the pot. It is the root system that needs to be accommodated. Some growers use soil like medias that consist of small bark chips, however sphagnum has been used with great success.
And remember “Orchids should be fed weakly, weekly”. Feed them once a month with a “Bloom Booster” and repot them every 1 – 2 years after they stop blooming in fresh potting mix.
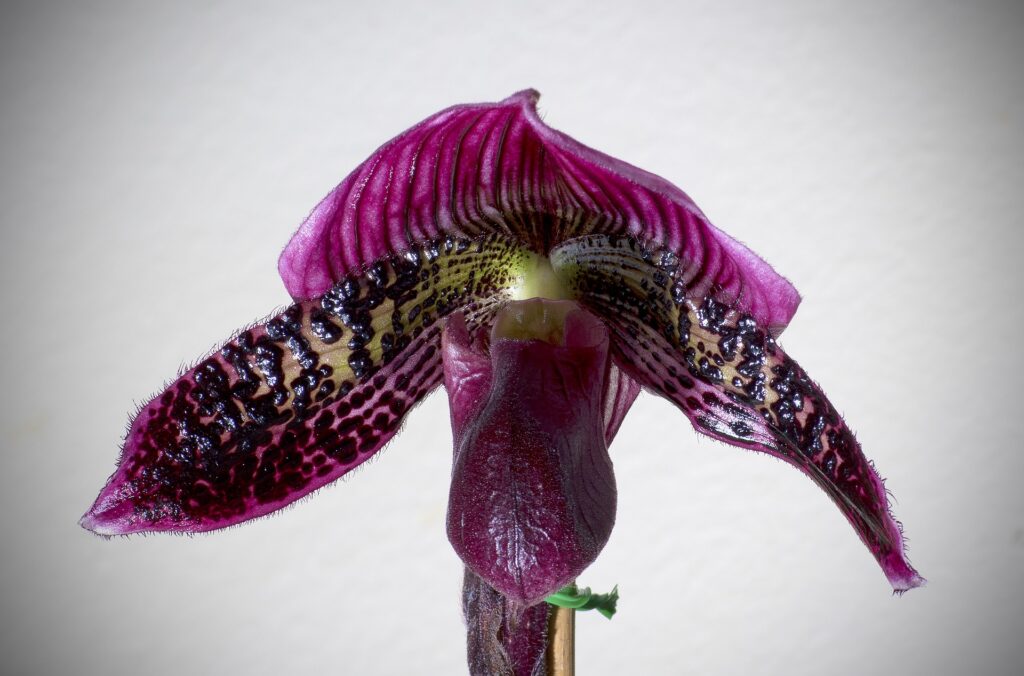
Caring for Your Paphiopedilum
(“Paph-E-O-Ped-E-Lum”)
Paphiopedilums (Paphs) do well in a diminished light. An east or west window is best if you keep them indoors. The east exposure is better because the temperature is lower in the early part of the day when the plant is receiving the greatest amount of light. A south window is acceptable if the sunlight is filtered so as not to burn the plant.
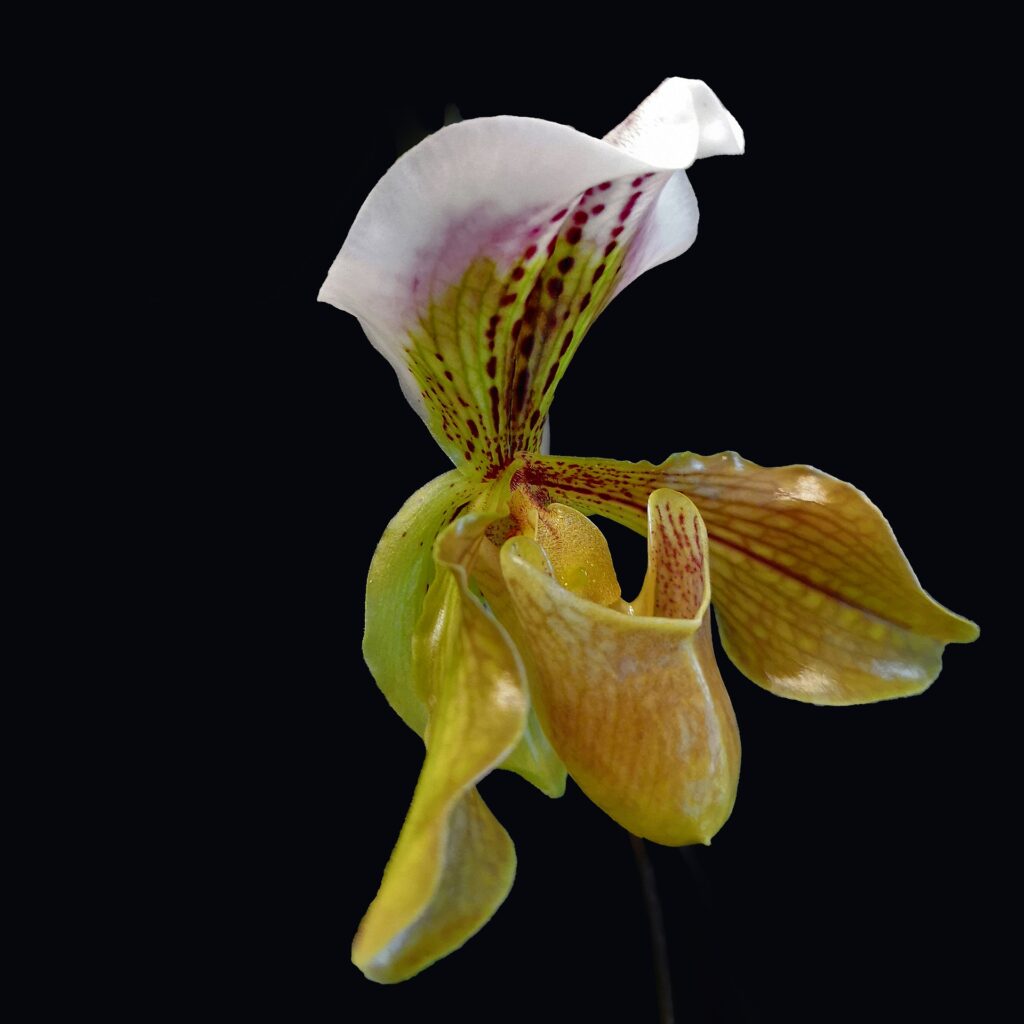
There are both warm and cool growing Paphs. Generally, those with mottled (Spotted) foliage and the strap-leafed, multi-flowered species (hybrids) do best in intermediate to warm conditions, 70-80 degrees F. and nighttime temperatures of 55-64 degrees. The cool-growing species are mostly from India and grow at higher elevations. Complex hybrids are cool growing and bloom mostly during the winter season.
These types prefer nighttime temperatures of 55-62 degrees with days around 65-70 degrees. They will all tolerate the heat of summer as long as they are regularly watered, shaded and kept in humid conditions. The mottled leafed varieties do best in a warmer house or apartment and can often bloom twice a year.
Like all orchids, it is important to water in the morning because it ensures complete water evaporation on the foliage as well as the crown by nightfall and prevents bacteria and fungus rot. Water the plant as its medium approaches dryness. When watering, allow the plant to drain well. Under most growing conditions, watering is done at 3–7-day intervals depending on the pot size and the medium.
Fertilize every time you water, all year round. Use a solution of 20-10-20 fertilizer every other watering. During fall and winter, reduce to every third watering.
Potting material is usually ready for replacement every 1 -2 years. The best time for repotting is spring through fall when temperatures are mild. Use a medium grade orchid bark mix for plants in 3.25” pots or larger, and a small mix for plants in smaller pots. Large plants with 6 or more growths can be divided. Pot with oldest growth.
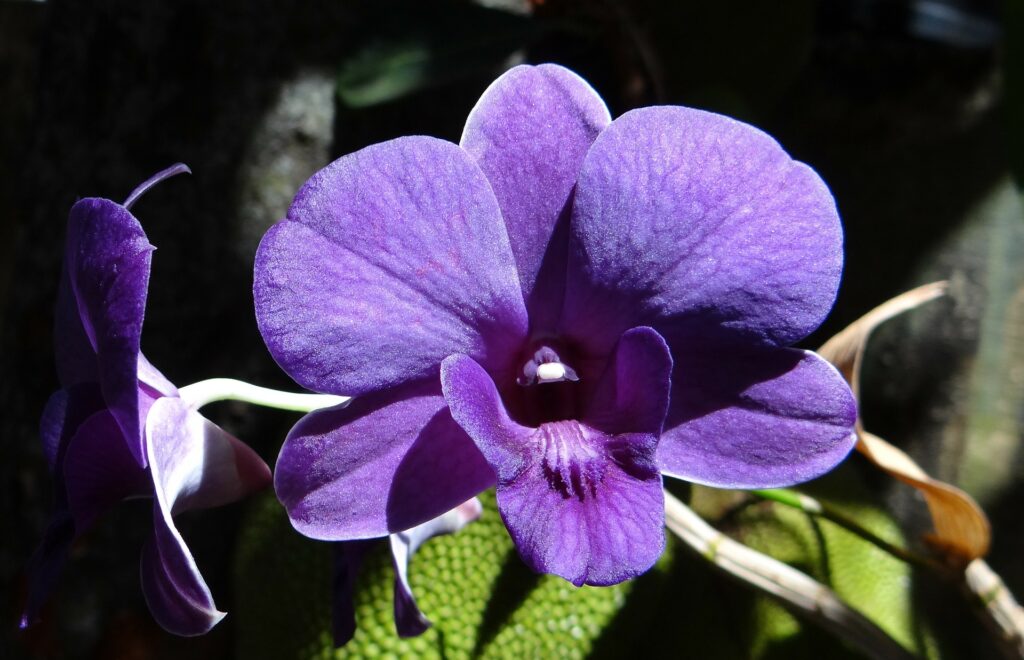
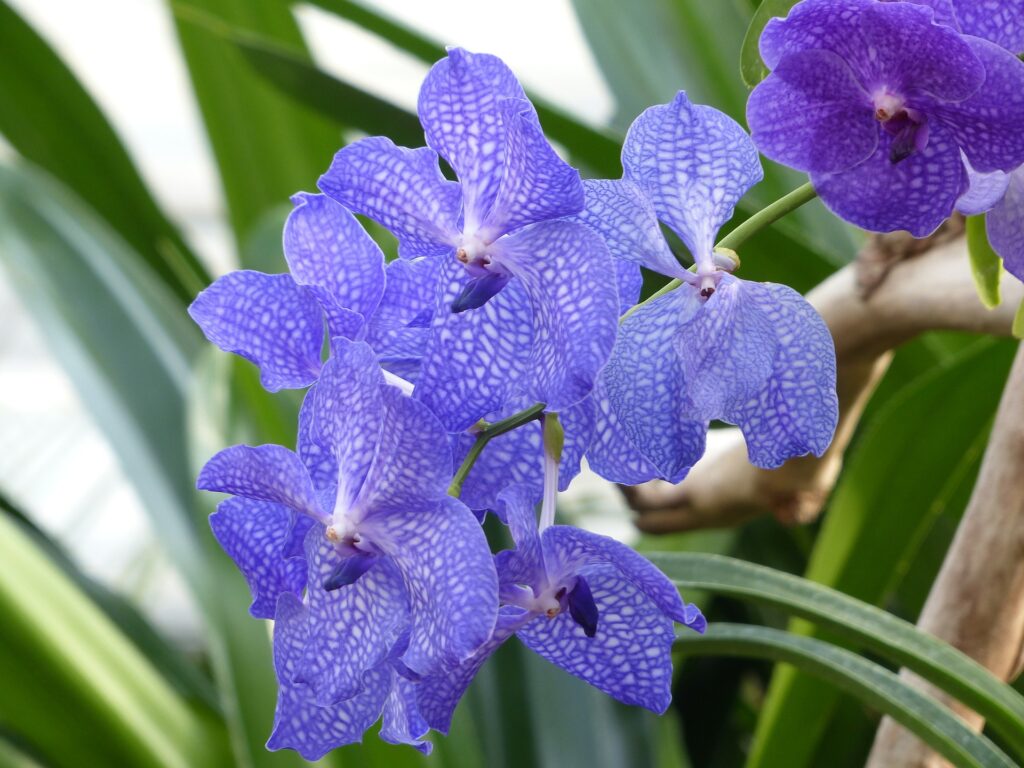
Caring for Your Vanda
(“Van-dah”)
Vanda orchids are monopodials. Monopodial orchids have a single stem and growing point at the tip, or crown, of the plant. They are generally upright, and the main stem may have buds. Vandas require at least 6-8 hours a day of filtered light, You can place them at the edge of a tree canopy if it’s not too full (Like Ficus Trees) and they do very well in a backyard patio with a cage as the screening filters out some os the sunlight. Too much sunlight causes the leaves to burn. Vandas benefit from full sun in the morning and late afternoon, but never during the middle part of the day.
Vandas grow best when daytime are 65 degrees or higher and can withstand long spells of hot weather and short spells of cold. They will continue in active growth throughout the year if they receive warm temperatures and bright light. Night temperatures should not generally be lower than 55 degrees for extended periods. However, they can withstand temperatures as low as 45 degrees for short periods of time. The best thing though is to bring Vandas inside if the temperature dips to 50 degrees or below.
Vandas should be watered daily, in the morning. Give them lots of water and let them dry. High humidity is necessary, and additional misting once or twice a day is helpful. Water less during the winter and during long cloudy spells, and after repotting. In any season, avoid watering plants late in the afternoon.
Spray with a fungicide twice a month. Also, a broad based insecticide should be sprayed on the forming buds to kill thrips. If not, they will suck the fluids from the buds and they will die. You can barely see them as they are extremely small but can do great damage to your Vandas and other orchids. Vandas need good air circulation. This also reduces the incidence of leaf-spotting fungal and bacterial infestations. And remember “Orchids should be fed weakly, weekly”. Feed them once a month with a “Bloom Booster”.
Repotting Your Orchid
Orchids are generally happy to stay in the same pot for at least 1 – 2 years. But it will outgrow its pot eventually and its potting mix will start to break down. It is time to repot! Do not be afraid, it’s a simple process! Here is how you do it:
Does Your Orchid Need Repotting?
Repot as infrequently as possible because it takes time for the plant to recover and start growing again. Two main reasons to repot are:
1. Hopefully, your orchid is thriving and growing. So every couple of years, you will need to provide your orchid with more space to grow! If your orchid is rootbound, it’s time to repot.
2. Usually, after a couple of years, the potting mix is breaking down and decomposing.
Orchids generally prefer looser potting materials such as bark and moss. These materials allow air and water to move around freely. However, back breaks down and causes it clump together around the roots, which causes poor drainage and airflow. This causes infections and root rot. Avoid Repotting when the orchid is spiking or blooming, even if it really needs repotting. It may result in your orchid losing its flowers, and causes extreme stress.
Now It is Time to Repot!
Follow these simple steps to ensure your plant is repotted safely:
1: Choose a New Pot. Choose a slightly larger pot with good drainage. You will need to find a pot that is 2 inches wider in diameter than the previous one. That will give the plant room to grow. Make sure the pot drains well and allows good airflow.
Choose one that is specifically for orchids. You can find a good selection of these online or at your local garden store. Sterilize the pot by soaking it in boiling water for a few minutes. Orchids are extremely sensitive to bacteria and toxins, so it’s important to sterilize all the equipment you use during the repotting process.
2: Prepare Your Potting Mix. Measure out enough fresh potting mix to fill your chosen pot. Most orchids require a loose mix of bark and sphagnum moss, though this can vary depending on the type of orchid.
Soak your potting mix in boiling water, then drain it well and spread it out to cool down. This will sterilize the mix and make it damp enough to give your orchid a moist medium after repotting.
3: Remove the Old Spikes. Cut old brown spikes near the base. Your orchid’s blooming season should be over by now, so this is a good time to do a little cleanup. Removing any old flowering spikes will allow the plant to use its resources more effectively.
To trim these spikes, clean your pruning shears with hot water and soap. After this, you will also want to sterilize them with alcohol to ensure that nothing on the blade can harm your plant. Once your tools are prepared, you can start trimming. Cut any woody, brown spikes near the base and dispose of them.
4: Remove the Orchid From Its Pot. After you have prepared your new pot and medium, you will need to remove your orchid from its current pot. Put on a pair of plastic or rubber gloves and grasp the orchid around its base, then carefully pull the orchid from the pot.
Unfortunately, this can sometimes prove to be quite a challenge. To make sure you do not damage any of the roots, often you will need to break the old pot so that you can protect the orchid itself.
5: Remove Old Potting Mix and Dead Organic Matter. Once the plant is out of the pot, you will need to remove all the old potting mix from the roots and base of the plant. Be careful not to harm any of the healthy roots in the process. Take your time and wipe away all the old material without pulling or tugging on the roots.
This is also a good opportunity to see if your plant has any dead or dying roots. Remove them for the health of your orchid, as they won’t be able to affect its growth as it settles into its new pot. Cut off any brown and dried roots that are clearly dead. You can also trim away any roots that look mushy or rotten. Be careful not to be over-zealous when doing this. If in doubt about a root, leave it
6: Place Your Orchid in Its New Pot and Water It. Now it is time for you to place your orchid in the new pot. Carefully lift it by its base and gently lower it into the potting material. Tuck some extra potting mix into any gaps in the roots, but do not pack it too tightly.
If you are using moss, you may want to wrap some around your orchid’s roots before you place it into the pot. This just makes it a bit easier to evenly distribute the potting medium around all the roots.
After it has safely repotted, you will want to make sure you water it sufficiently. You will want to make sure your fresh potting medium receives enough water to saturate it. Make sure to drain any excess water, to prevent root rot. You can also gently mist your orchid for the next few days.